
A single squad can have a hard time to take out enough insurgents to create a window of opportunity. If an infantery squad tries to engage 3 insurgent squads it risks to be pinned down and overwhelmed, because the rate of loss on the insurgents side is not so high that it cant be replenished from nearby fobs. Therefore a focused CONTEMPORARY engagement by multiple squads is needed to increase the rate of loss on the insurgent side to a degree that a window of opportunity is created, to maneuver take out F.O.B. s and finally the cache.
Armor and lightly armored attack vehicles should be located behind friendly infantery units and surpress the enemy from a distance. Only when friendly infantery is in a close in firefight friendly armor should move up and only if it is not possible to support the BluFor from the current position. Moving torwards an enemy engaged in close in firefights reduces the probability to find him prepared and equipped to ambush armored targets, but does not exclude the possibility.
1. Deployment
When no cache marker is avaible a sizeable force at least 3 squads should seek out contact with the enemy, backed up by armor of some kind, even an humvee. A team this large gives the medics enough breathing room to revive and heal.
If a marker does pop up a single squad rushing it could take it down if the enemy is not prepared, however rushing on top of a cache with an humvee that is likely to be met by 15 insurgents is (un)healthy optimism that will get the humvee and squad killed.
2. Setting up
The first step to set up is locating an assembling area and an area for a FOB. The 2 can be in the same location. The fob is important on AAS maps, on insurgency maps it is vital. It gives soldiers joining the battle the opportunity to enage in a situation where damage inflicted upon the enemy can be exploited. If the redeployment takes so long, that the insurgency has sufficient time to fully replenish its forces, no progress can be made.
After one or 2 Fobs have been built, all squads that want to attack or surpress should assemble at the assembly area and move in toegether. If you are the first squad that arrived wait for the rest of the team to join you and defend the assembly area.
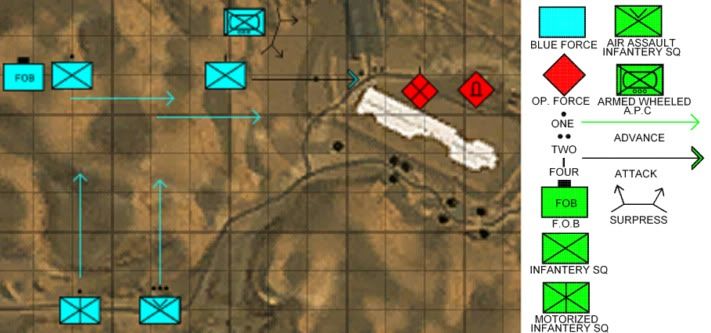
3. Area control. Before the cache can be searched the Area needs to be controlled to a certain degree. That might require seizing nearby objectives that give the team an tactical advantage, such as seizing the high ground, or controlling the streets in a city. Strategic objectives seized by friendly forces give the team an advantage.
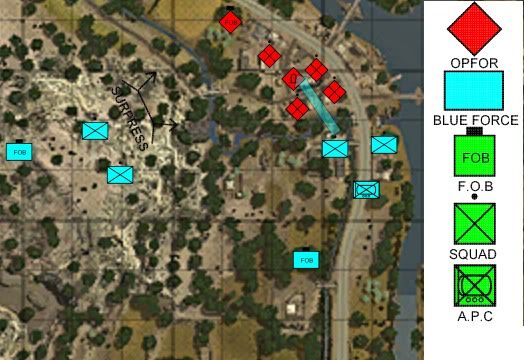
Control of the highground needs to be denied from the enemy so he does not shoot down on Blueforce Squads. The Blueforce controlling the high ground can effectively engage or surpress enemy soldiers at the cache location, enemy soldiers approaching the compound and enemy soldiers attempting to climb one of the other hilltops.
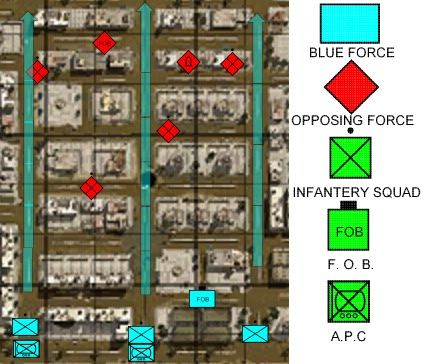
Insurgency in an urban area.
In a city it is important to control a number of streets in the target area to avoide being outmaneuvered by the insurgents and attacked in the rear. Armored units can put fire down the road to further surpress the enemy. If the squad faces fire it should enter a building or a similiar location and engage the insurgents from there untill it is safe to move further again. The team should push past the cache marker, to drive the insurgents out of the area and take out the enemy FOB if possible, unless the cache is found and destroyed beforehand at which point the team retreats.


