Revealed May 30-2011
By the heavens of God, I blessed to share with you the Holy Bible of Squad Leading. The holy father has revealed to me information and I am chosen to share what I know now to you! All Squad Leaders who wish to be saved from eternal damnation must learn from these teachings!
BASICS OF SQUAD LEADING:
The purpose of the Squad Leader is to direct the objective of the SQ. You provide goals to Squad-mates and in return they assist you in your objective. Remember back in the oldest days of warfare, the Squad Leader was issued a officer pistol to execute and make a example of disobedient or dis-functional soldiers. However with evolved time, we now kick and lock out unwanted Squad-mates. This is a supposedly modern intervention.
The Command Map CAPSLOCK by default features a MANAGE SQUAD Button which allows you to select, locate, request and remove SQ-mates.
Please label your SQ in the Command Map / Squad Menu the appropriate name for the purpose of your SQ allowing your Commander to use your potential.
Combative roles
INF- 4-6 Infantry, basic combat, diverse potential, attacking or defending unit.
SNIPER/SPOTTER - 2 observation infantry cell and long range engagement unit
CAS- Close Air Support, direct area of attack infantry supportive air unit.
TANK/TECHNICAL/APC - Land Vehicles, with ranged weapons, Technical and Armored Personal Carriers can transport Infantry units.
Defensive roles
MINING/SAPPERS - Engineers who lay mines/explosive devices to disable or block Enemy movement, perfect to set up ambushes.
MORTAR/ARTILLERY - Indirect area of attack land supportive fire base,
Supportive roles
LOGISTICS/TRANSPORT - Activity of transporting infantry or supplies from pick up locations to drop zones by land and by air.
ORDERING YOUR SQUAD AND MARKING TARGETS
The best SL's do not have to fire a round to kill a enemy, they order it.
The Squad Leader has alternate and added commo rose team menu/soldier command menu, we will refer to this as the Squad Leader Spotting menuQ by default
The SL has a expanded commo rose squad menu/request kit menu, we will refer to this as the Squad Leader order menu T by default
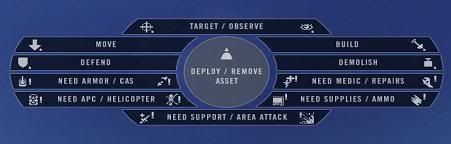
SL Order Menu
TARGET/ OBSERVE, MOVE, BUILD, DEFEND and DEMOLISH - Marks the 3d map with selected icon for your SQ-mates to see. The only difference is the icon, and command. The OBSERVE command doesn't cause your character to shout out a in-game voice command.
The various NEED options displays the selected icon option for your team to view.
The DEPLOY / REMOVE ASSET allows you to deploy structures for your SQ to build using their entrenching tools, you can only remove a asset un-constructed. If ASSETS are not completely constructed, they will slowly be un-constructed. To reposition a asset, order you SQ to cease building so you can remove it. Warning, deploying too close to you or SQ-mates can kill you or others during the asset's spawn.

SL Spotting Menu
The SL Spotting Menu features a ability to mark targets on the 3d map for SQ-mates to see. You can mark targets using the Command Map CAPSLOCK by default as well.
The Officer Kit features a GLTD which displays the distance on screen in your HUD.
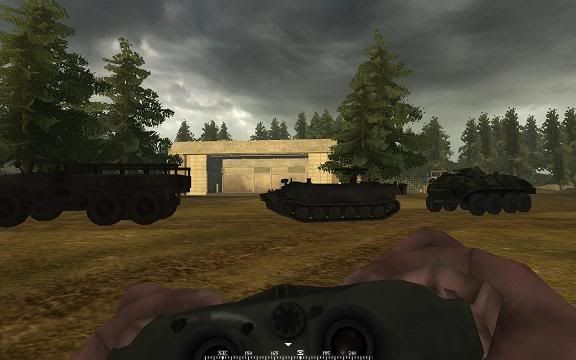

The small red number bottom right of the cross-hair is the distance range.
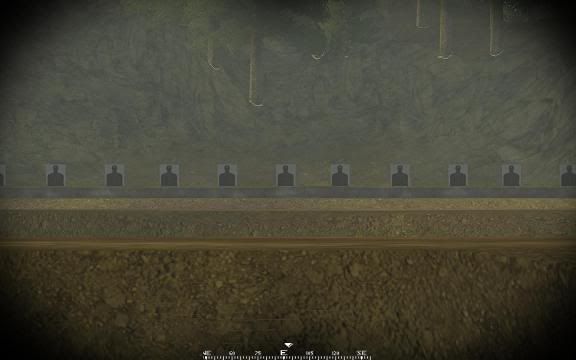
If you do not have a Officer Kit, you can still mark targets but you have to open your Command Map CAPSLOCK by default to find the range.
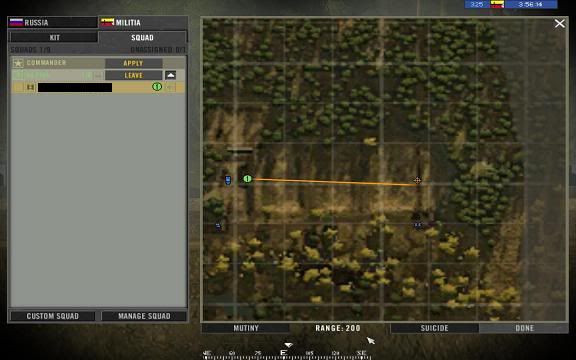
The range is located on the bottom of the map between the MUTINY and SUICIDE Buttons

Once you find out the range, you set the marker at the correct distance and request CAS/MOTAR fire support.
Mark important targets or call in a Area Attack, for your commander.
Mark targets for Mortars/Artillery
Mark targets for your SQ or SNIPER
Mark targets for Grenadier and report the distance
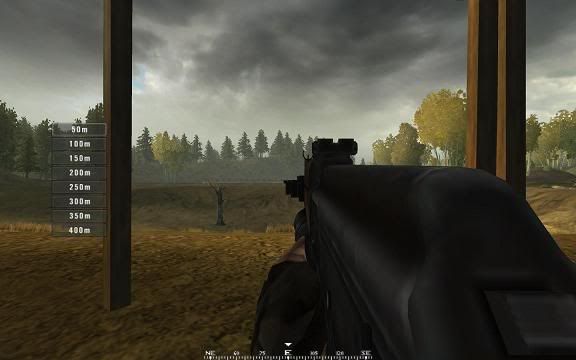
Be sure to tell your Grenadier the range, so he can easily set the range on his sights and take out targets before they can move.
The Squad Leader is responsible for his squad as much as leading the squad. SL's recieve their orders and report situational reports (SITREP) to the commander.
This guide will be fully revealed and finished in the future...
THE FRONTIER
There are 3 combat zones of positions on your side of the enemy direction that reflect the danger and type of safety on the battlefield.
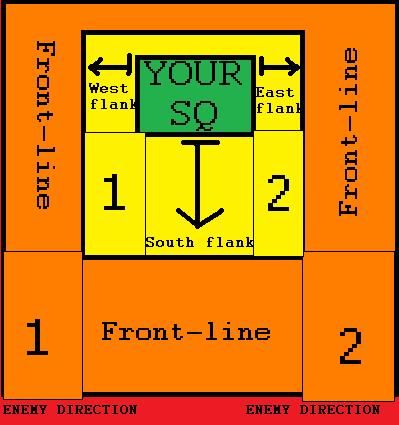
The Frontline is the advance zone and closest position which most likely engages the enemy.
The Flanks are maneuver positions allowing your SQ to move around the conflict zones, getting the drop on the enemy.
The Your SQ are a safe zone already secured by your team.
Area 1 should always be occupied by your forces, this allows the maximum visibility around the front-line. The back Area 1 can support the front Area 1.
Area 2 should always be occupied by your forces, this allows the maximum visibility around the front-line. The back Area 2 can support the front Area 2.
Look familiar? It should, these area's use to be tower positions on fortifications like castles. They allow the maximum damage of ranged attacks which is the main attack of modern soldiers.
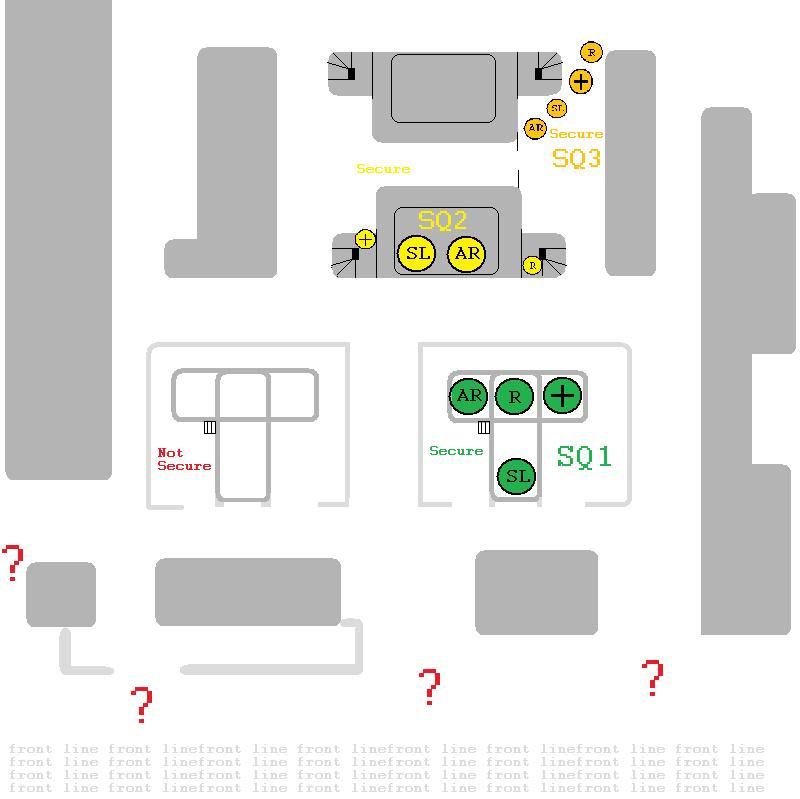
Here is a example of knowing which part of the front-line is covered and where to move your SQ to support other SQs on the battlefield.
"SQ2 or SQ3 should move to the unsecured compound with the T building SW of their location."
The higher the SQ in elevation, the more time it takes for the unit to move positions, however higher elevation has more visibility.