The HAT kit is probably one of the most underused weapons in PR. Its primary function is to engage Tanks and APCs, but it can be also employed to engage an enemy fortification, targeting machine gun nests firebases and bunkers.
However witht he supply being limited its use should be prioritized for the most pressing threats.
Generally the maps are balanced, if armor is present, anti armor vehicles are present as well. If armor is present on a map, the kit should be prioritized for anti armor.
The kit should be picked up only if friendly armor gets destroyed, so it is avaiable right away for defense. If the primary treath are apcs one of the squads most likely to run into an apc migh as well grab an HAT kit, however if one or more tanks are present, the HAT kits should be pooled in a squad, so that an HAT team can engage Armor with multiple HAT kits.
All targets but Tanks can be heavily damaged with a hit in almost every spot. The armor is weakest in the rear and sides and top and strongest in the front, try to target the weakpoints if possible.
The HAT kit carries only one round, therefore an ammo source should be deployed to repeadetly fire the HAT, such as an ammo crate held by almost every type of vehicle, or a supply crate delivered by large helicopters or trucks.
If the situation does not allow for such supply, have your squadmembers pool their ammo bags. Ammo bags lose ammo points untill they are depleted, if the ammo is not sufficient for a new round the bag dissapears and so do the ammo points. However if multiple bags are present ammo points keep piling up from the remaining sources, even if a bag dissapears, that way a reload is ensured.
Fiering the HAT kit.
The Hat kit takes a while to deploy. Once stationary the Gunner can take aim, by right clicking. Aiming is affected by movement and to a lesser degree by mouse movement, but not by switching between stand crouch and prone position.
It is only possibile to fire the kit standing or crouching. However the aim will stabilize when prone as well, making it possible to go prone behind a ridge or obstacle, standing up fiering right away and going prone again.
The Hat Kit in Urban areas.
Urban areas offer usually a lot of cover and hideouts, such as balconies and roofs to deploy the HAT kit right at the frontline. If armor is present, detatch toegether with a squadmember from the squad and seek out an elevated position inside a building or on the top of a roof. Hitting the top causes more damage than engaging the front.
The HAT kit in Jungle areas.
Just keep a sufficient meatshield between yourself and the treath and it should be no problem to target the treath out of the cover of the jungle. Depending on the situation however, resupply might be difficult. If your squadmembers pool their ammo bags you should get 2-3 additional rounds out of it however.
The HAT kit in woodland areas.
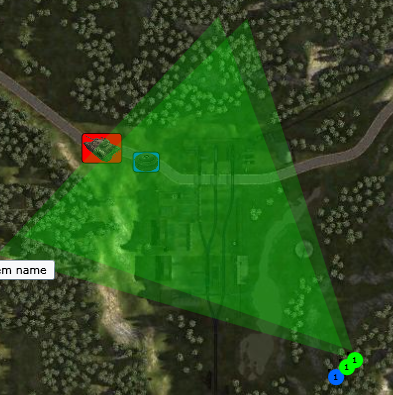
Woodland areas tend to be hilly and offer a decent ammount of cover. Seek out a position alongside the road, that is if possible elevated in a point where the armor is likely to stop movement and looking to engage.
Try to hit the top, if you can not gain an elevated position, let the armor pass you and shoot the rear.
A HAT team ambushes a tank with multiple launchers.
The HAT kit in desert areas.
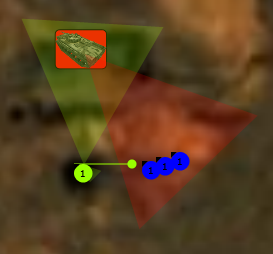
In the open any soldier is easy prey for armor. On the upside he is harder to spot, but by no means invisibile. Look for slopes and ridge lines when in the open, to hide behind and ambush armor, if the HAT kit is the last piece of AT weapon avaiable. Else try to call in other means of AT first.
Do not engage a tank unless you have multiple hat kits ammo or can target its weakpoint. Once spotted and acquired you are easy prey for armor.
The HAT gunner relocates to take down the armor, while the rest of the squad is being overwatched taking cover below a ridge line.
The HAT kit in the squad.
The HAT gunner should use his rifle primarly for self defense and always keep friendlies between himself and the enemy. When armor is present he should detatch from the squad and hide, if possible, or at least relocate by 50m or so. When the squad is engaged it is more likely the HAT gunner can counterfire the attacking armor without being engaged right away himself.
One of the squadmembers should attempt to spot the enemy armor and forward its position to the gunner as good as he can.
If no ammo crates or supply crates are avaiable he should ask his squadmembers to pool their ammo bags into a pile to reload his weapon. The ammo bags a single squad holds on average should be enough for 2-3 rockets.