The BRDM-2 and You
Posted: 2009-03-08 22:49
As with mathematics, I have a love hate relationship with the BRDM-2. On one hand, it's a quick and versatile bit of equipment capable of ruining anything in the sub-APC range with ease. On the other hand, it's a fiddly piece of shit that makes me want to choke a baby.
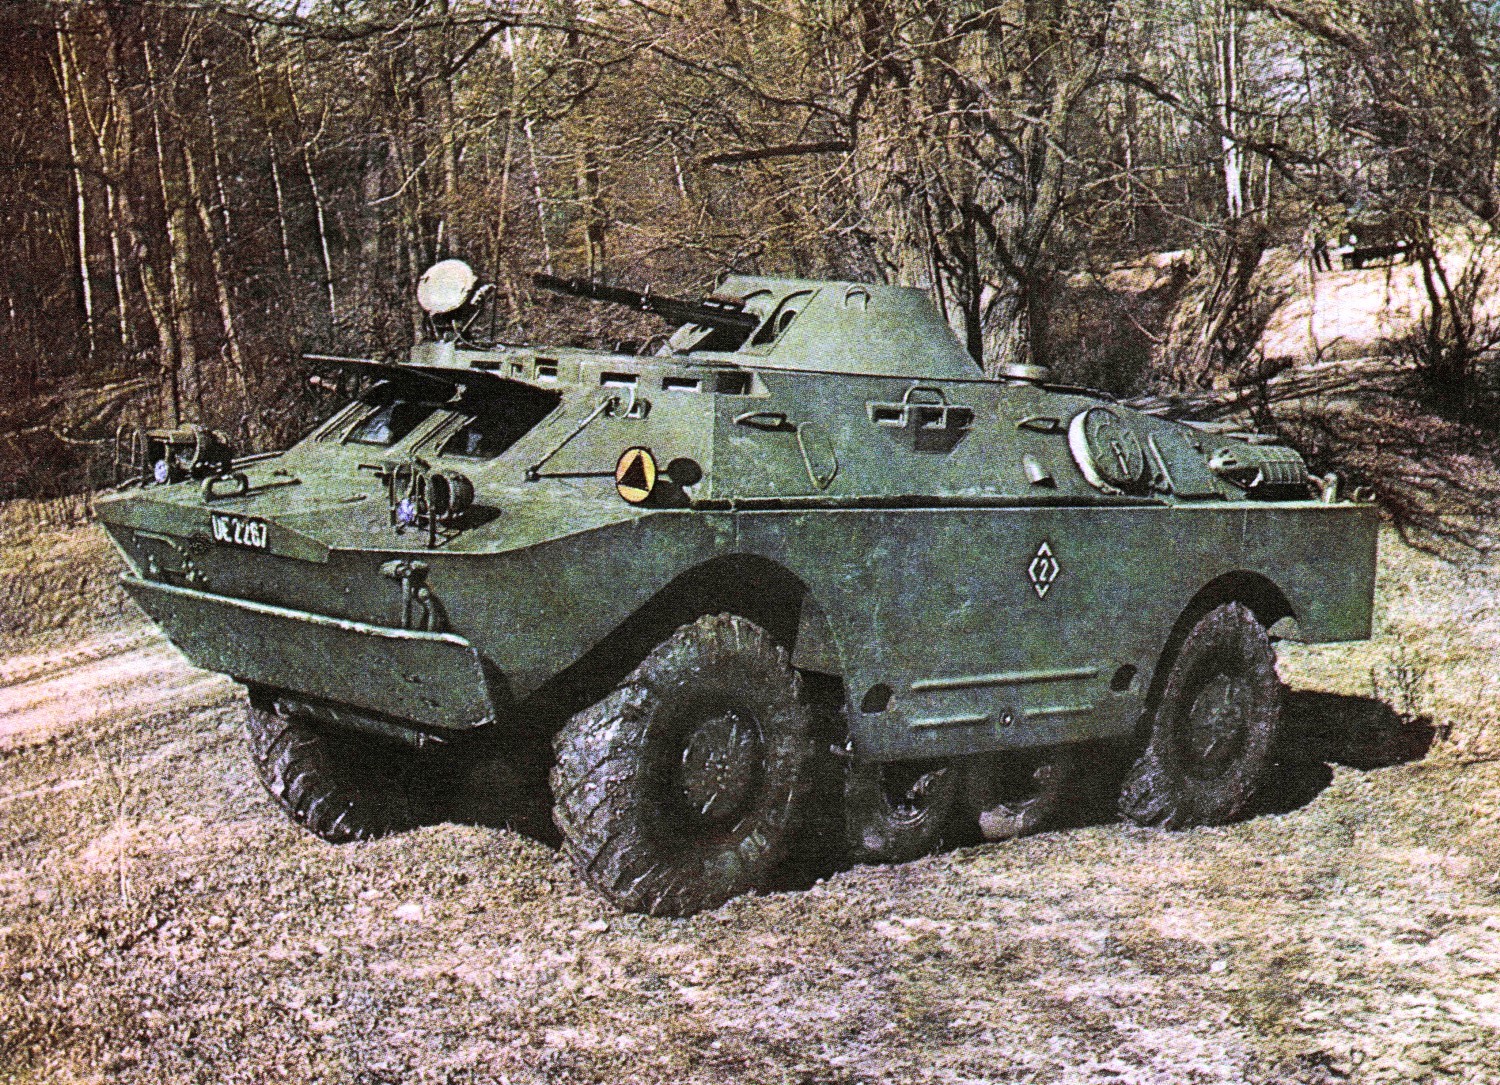
The BRDM-2 (Boyevaya Razvedyvatelnaya Dozornaya Mashina, Боевая Разведывательная Дозорная Машина is an armed and sort-of armored combat recon vehicle. It is a scout car capable of traversing both water and land, making it an amphibious vehicle. It was designed in the Soviet Union, and produced in numbers beyond 7,000 in the mid 1980s by GAZ.
Developed as an upgrade to the BMP-1, it features an enclosed turret, sights, and NPC protection. It mounts the 14.5 mm KPVT heavy machine gun and 7.62 mm PKT coaxial general purpose machine gun. It was designed with belly wheels to better help it cross rough terrain.
In game. the BRDM-2 is used by Russia, the MEC, and the Chechens. Given that the real vehicle was deployed world-wide and has a variety of uses and upgrade packages, it is no surprise that more than one faction finds use for it. If I had to design an army from scratch, I would include this vehicle.
The armament is the exact same as the ones found on the BTR-60 used by the MEC and Russia. The machine gun fires the same round used by the PKM and HK-21 infantry support weapons, though the 14.7mm gun is only featured on the BTR-60 and the BRDM-2. This gives the BRDM-2 an interesting mix of the lightest and heaviest vehicle MG's in the game. It carries 500 14.7mm rounds and 1400(?) PKT rounds. It does not have smoke countermeasures.
The vehicle suffers from HORRIFIC off road handing, requiring some skill to prevent it from flipping over. It also suffers from limited deflection, preventing it from being able to fire on infantry in close order. The driver also has a difficult time with tiny windows. Although an optional scope view overcomes this, it is limited to a 90* traverse.
The turret has 360 degree traverse, and can fire both of its weapons simultaneously. The KPV HMG is limited to AP rounds, which while more powerful than a .50, yield no splash damage and are ineffective against infantry in cover. The weapons are capable of destroying logistic trucks in a mere 10-20 rounds, and are equally effective against lighter vehicles. It is also damaging to firebases and similar assets. The 360* shielding prevents the gunner from being killed directly. It can kill other BRDM-2's and their variants very quickly, but seems incapable of destroying AT guns.
The vehicle seats a grand total of four players, but requires two crewmen to operate, making it the least efficient troop transport in the game. It carries a single ammo resupply crate, placing it between the humvee and APC categories in terms of utility.
The hull is poorly armored and susceptible to .50 fire and up, though rumor has it that rifle fire can eventually erode it away. A single AT round of any form will completely obliterate this vehicle.
Because it can float, it has special utility on the maps featuring rivers or other water features. Examples include Asad Kal and Kozelsk. Kozelsk is a particularly good map for these vehicles, as the wide lake or ocean in the left portion of the map gives it plenty of "alone time" to flank and move behind forces to hunt down key assets. With a skilled driver and attentive gunner, this vehicle can last a very long time (My top record in a single BRDM-2 being 8-1).
Tips for usage:
* Stay away from direct combat situations, especially when other vhicles are present. A 2 man crew carries heavy anti-infantry support weapons, and is ideally used hull down along a flank to rip into soft targets.
* Search and Destroy. 2 crewmen, 1 HAT and or 1 AA can become a highly mobile specialist squad. The BRDM-2 can destroy logistic and transport trucks with ease, while the HAT/AA takes care of their targets. Incendiary grenades present on HAT/AA units can destroy already built assets while the BRDM-2 covers. A variety of other kits can be used, including plain riflemen for the asset hunting role. You are also not a particularly large or technically powerful vehicle, so you take little direct combat ability away from your team if you combine a fully crewed BRDM-2 and a combat engineer to ruin defenses and destroy bridges.
* Capture flags. With your speed and water mobility, you can easily push on poorly defended flags. If your team thinks they're tying up the bulk of the enemy between flags, then you may be able to seize one from behind their line of defense.
How to fail:
* Charging at things. A single LAT or .50 can end you. A fully crewed BRDM-2 is worth 7 tickets, 9 if you're a full house.
* Idling. Your engine is loud. If you're staying in one location, have th driver exit the vehicle and act as a pair of "ears" for your gun.
* Rushing off road. You tip easily. Take it carefully and slowly or you will score no kills and end up wasting 5-7 tickets.
Protips:
* Shark your foes. By this I mean wait for them to enter open areas / patrol open areas and circle around them while firing. Do not approach and allow them to easily use AT/Incendiaries against you. Withdraw if you think they're packing something; suicide is for sheep, not sharks.
* Wolf-pack your BRDM-2's. Travel in wide-spread groups. When you encounter an enemy, come together to create interlocking fields of death. How do you defend against a BRDM-2? You blow it up with the LAT. How do you stop 2? 3?
* Supply runs. If you're close to your teams defense, you and or your wolf pack should dump all your ammo boxes near them to provide extra firepower.
M.
The BRDM-2 (Boyevaya Razvedyvatelnaya Dozornaya Mashina, Боевая Разведывательная Дозорная Машина
Developed as an upgrade to the BMP-1, it features an enclosed turret, sights, and NPC protection. It mounts the 14.5 mm KPVT heavy machine gun and 7.62 mm PKT coaxial general purpose machine gun. It was designed with belly wheels to better help it cross rough terrain.
In game. the BRDM-2 is used by Russia, the MEC, and the Chechens. Given that the real vehicle was deployed world-wide and has a variety of uses and upgrade packages, it is no surprise that more than one faction finds use for it. If I had to design an army from scratch, I would include this vehicle.
The armament is the exact same as the ones found on the BTR-60 used by the MEC and Russia. The machine gun fires the same round used by the PKM and HK-21 infantry support weapons, though the 14.7mm gun is only featured on the BTR-60 and the BRDM-2. This gives the BRDM-2 an interesting mix of the lightest and heaviest vehicle MG's in the game. It carries 500 14.7mm rounds and 1400(?) PKT rounds. It does not have smoke countermeasures.
The vehicle suffers from HORRIFIC off road handing, requiring some skill to prevent it from flipping over. It also suffers from limited deflection, preventing it from being able to fire on infantry in close order. The driver also has a difficult time with tiny windows. Although an optional scope view overcomes this, it is limited to a 90* traverse.
The turret has 360 degree traverse, and can fire both of its weapons simultaneously. The KPV HMG is limited to AP rounds, which while more powerful than a .50, yield no splash damage and are ineffective against infantry in cover. The weapons are capable of destroying logistic trucks in a mere 10-20 rounds, and are equally effective against lighter vehicles. It is also damaging to firebases and similar assets. The 360* shielding prevents the gunner from being killed directly. It can kill other BRDM-2's and their variants very quickly, but seems incapable of destroying AT guns.
The vehicle seats a grand total of four players, but requires two crewmen to operate, making it the least efficient troop transport in the game. It carries a single ammo resupply crate, placing it between the humvee and APC categories in terms of utility.
The hull is poorly armored and susceptible to .50 fire and up, though rumor has it that rifle fire can eventually erode it away. A single AT round of any form will completely obliterate this vehicle.
Because it can float, it has special utility on the maps featuring rivers or other water features. Examples include Asad Kal and Kozelsk. Kozelsk is a particularly good map for these vehicles, as the wide lake or ocean in the left portion of the map gives it plenty of "alone time" to flank and move behind forces to hunt down key assets. With a skilled driver and attentive gunner, this vehicle can last a very long time (My top record in a single BRDM-2 being 8-1).
Tips for usage:
* Stay away from direct combat situations, especially when other vhicles are present. A 2 man crew carries heavy anti-infantry support weapons, and is ideally used hull down along a flank to rip into soft targets.
* Search and Destroy. 2 crewmen, 1 HAT and or 1 AA can become a highly mobile specialist squad. The BRDM-2 can destroy logistic and transport trucks with ease, while the HAT/AA takes care of their targets. Incendiary grenades present on HAT/AA units can destroy already built assets while the BRDM-2 covers. A variety of other kits can be used, including plain riflemen for the asset hunting role. You are also not a particularly large or technically powerful vehicle, so you take little direct combat ability away from your team if you combine a fully crewed BRDM-2 and a combat engineer to ruin defenses and destroy bridges.
* Capture flags. With your speed and water mobility, you can easily push on poorly defended flags. If your team thinks they're tying up the bulk of the enemy between flags, then you may be able to seize one from behind their line of defense.
How to fail:
* Charging at things. A single LAT or .50 can end you. A fully crewed BRDM-2 is worth 7 tickets, 9 if you're a full house.
* Idling. Your engine is loud. If you're staying in one location, have th driver exit the vehicle and act as a pair of "ears" for your gun.
* Rushing off road. You tip easily. Take it carefully and slowly or you will score no kills and end up wasting 5-7 tickets.
Protips:
* Shark your foes. By this I mean wait for them to enter open areas / patrol open areas and circle around them while firing. Do not approach and allow them to easily use AT/Incendiaries against you. Withdraw if you think they're packing something; suicide is for sheep, not sharks.
* Wolf-pack your BRDM-2's. Travel in wide-spread groups. When you encounter an enemy, come together to create interlocking fields of death. How do you defend against a BRDM-2? You blow it up with the LAT. How do you stop 2? 3?
* Supply runs. If you're close to your teams defense, you and or your wolf pack should dump all your ammo boxes near them to provide extra firepower.
M.
